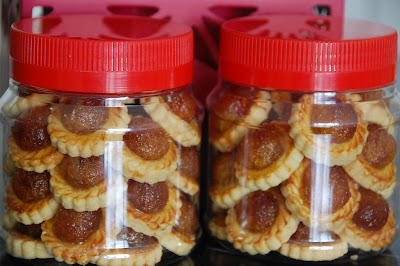
No Introduction Needed
If you have been following me on this space for some time, you will know that this kind of pictures tend to come up during this season.
While I was packing these two little containers for my bosses, I was thinking that this year I needn't make any label for it as these needed no introductions. Whereas, last year I still had to tag my creation as it was just plain weird.
My mom had declared that this year we will not be buying any of those usual festive goodies as every year most of it goes into the trash bin. Well, that's good news for our waistlines and wallets but bad news for that itchy mouth like mine!
So I decided that if I make them myself, I won't be running afoul of her edict, will I? How very smart of me!
Though I have been making these tarts, I was never totally satisfied with the pastry crust I'd tried from various recipes. Either it was too cakey, or doughy, or dry, or something. And then there was the matter of the pineapple filling. As I bought them off the shelf, I had totally no control over the quality. My previous batches had filling that were always so tough and chewy that my brother complained that he is going to lose all his teeth eating my tarts and my sister couldn't open her mouth once after eating one cos her teeth were tightly gummed together. I have a knack for making things that people would remember for a long time. Even though usually for the wrong reasons.
This time round I happen to chance upon Bake King's pineapple filling while I was at NTUC and promptly picked one pack up. As a precaution against tough and chewy filling, I learnt from another blogger (whom I had forgotten exactly who; apologies!) to add the juice of a whole lemon to it before rolling them into balls. I think this gave the filling a more balanced taste than just cloying sweetness and also it adds more moisture to prevent the filling from drying out during baking.
For the pastry crust, I went back to Mrs Leong's recipe and was glad that I found it. The pastry was buttery yet light, but not overly crumbly. On its own, it is a good balance of sweet and savoury which goes well with the pineapple filling.
On the whole, I would say that I am really happy with this batch of pineapple tarts and looking back at all those previous batches, I think it probably qualifies as the better looking ones to have appeared here. (^.^)
Happy Chinese New Year to all my readers!
*********************************
Pastry Crust for Pineapple Tarts
(from Mrs Leong's Festive Cooking)
*********************************
560g plain flour
2 tsp baking powder
340g chilled butter, cut into cubes
2 tbsp sugar
3 egg yolk, beaten lightly
1 tsp vanilla essence
1/2 tsp salt
6 - 8 tbsp water
FOR PASTRY GLAZE:
1 egg yolk
1 egg
2 drops of water
1. Mix the plain flour and baking powder together in a mixing bowl.
2. Add the chill butter cubes into the flour mixture and rub them into the flour using your fingertips until they resemble the texture of coarse sandy breadcrumbs. Do not over-work the mixture.
3. Mix the sugar, egg yolks, vanilla essence and salt together and add to the flour mixture. Mix well.
4. Add 4 tbsp of water to the dough. Mix well. Progressively add another tbsp of water to the dough until the dough comes together. My dough required only 6 tbsp.
5. Chill the dough for 30 mins before using.
6. Roll the dough out on a floured surface to a thickness of no more than 0.5 cm. Stamp out the tarts with the appropriate cutter and add the rolled pineapple tart filling on.
7. Combine the pastry glaze in a small bowl. Brush the top of the pastry crust.
8. Bake for 175 degC for 10 min and then lower the heat to 150 degC and bake for further 15 - 20 mins until the tarts have turned golden brown.


Wow, your pineapple tarts look really neat. I made these ridiculous looking ones last time (see http://openkitchenconcept.blogspot.com/2010/02/homemade-pineapple-tarts.html) - and really a lot of effort! Well done!
ReplyDelete